My Robin Hood nearly caught alight
Moderator: Contaminated
-
DJ.

- Posts: 6001
- Joined: Mon May 30, 2011 7:31 pm
- Contact:
Re: My Robin Hood nearly caught alight
Great news, back on the road soon I hope!
-
greenwoo
- Site Admin
- Posts: 10185
- Joined: Thu Dec 03, 2009 10:34 am
- Contact:
Re: My Robin Hood nearly caught alight
nice one Rich, such a pity it happened before the 'mini tour' and not on any old sunday run....still, least its sorted now
-
Wingco
- Posts: 2761
- Joined: Thu Jul 26, 2012 9:49 am
- Location: Swanley, Kent
- Contact:
Re: My Robin Hood nearly caught alight
That was a good read Richard, can't believe how many wire you have got rid off.
Hopefully not to long now and you will be back on the road.
Hopefully not to long now and you will be back on the road.
Mirror, Signal go faster pedal !!
-
locost220

- Posts: 4490
- Joined: Sat Mar 13, 2010 7:31 pm
- Location: Lewisham South London
- Contact:
Re: My Robin Hood nearly caught alight
Thanks guys, despite being eager to get out for a drive in this nice weather I have decided to push on with further works, including making a new unproved fusebox support that will also hide the loom wires beneath better than the original, moving some other relays, replacing the HD battery isolator wiring and some other smaller wires that are all fixed to the pedal and steering column support and look bad when the bonnet it up, going to see if I can raise the steering wheel as will make it more appealing to other users and replace and overhaul the front brakes due to a snatching issue so guess it will be a while till I can get back on the Locost on going issues.
Locost book chassis, Undergoing testing post rebuild 

Robin Hood 2B, keeping me sane
Sylva Leader, stuck to the trailer
Robin Hood 2B, keeping me sane
Sylva Leader, stuck to the trailer
-
locost220
- Posts: 4490
- Joined: Sat Mar 13, 2010 7:31 pm
- Location: Lewisham South London
- Contact:
Re: My Robin Hood nearly caught alight
So pushed on again this week and weekend, managed to get the gauge light working without too much hassle and trim down the melted bits on the brake res plug till it fitted.
Made up a brackets, extended the wires and moved the three odd relay as they would not easily go in the fuse box, replaced, moved some of the added on wires behind the dash, combined many of the same with the battery terminal wires to tidy it all up.
Then set about make up a new box for the fuse box to fit on, the previous one was low and long to accommodate all the original loom but I wanted a stubbier taller one that I marked up on a piece of cleaned up shelving unit shelving and cut out with grinder and dremel and a new coats of paint once I had added some fixing tabs to it and rivnut to the rubber top.
All eventually screws together once I had loomed the wires up in black tape.
Now onto a few more odd jobs
- Attachments
-
-
-
-
-
Locost book chassis, Undergoing testing post rebuild
Robin Hood 2B, keeping me sane
Sylva Leader, stuck to the trailer
Robin Hood 2B, keeping me sane
Sylva Leader, stuck to the trailer
-
Fury1630
- Posts: 5342
- Joined: Thu Mar 04, 2010 7:11 am
- Location: Camberley
- Contact:
Re: My Robin Hood nearly caught alight
I have similar photos of discarded wire from both the Quantum & the Stylus
It's well worth doing for the weight loss, the safety, how it looks & future fault finding points of view.
Well done!
It's well worth doing for the weight loss, the safety, how it looks & future fault finding points of view.
Well done!
Rickman Ranger
Fisher Fury
Quantum 2+
SSC Stylus
http://blatterbeast.blogspot.com/
http://www.pistonheads.com/regulars/ph-carpool/fisher-fury-ph-carpool/31848
Fisher Fury
Quantum 2+
SSC Stylus
http://blatterbeast.blogspot.com/
http://www.pistonheads.com/regulars/ph-carpool/fisher-fury-ph-carpool/31848
-
locost220
- Posts: 4490
- Joined: Sat Mar 13, 2010 7:31 pm
- Location: Lewisham South London
- Contact:
Re: My Robin Hood nearly caught alight
So over the past couple of weeks I have slowly been picking off the extra bits I decided to do, in no particular order
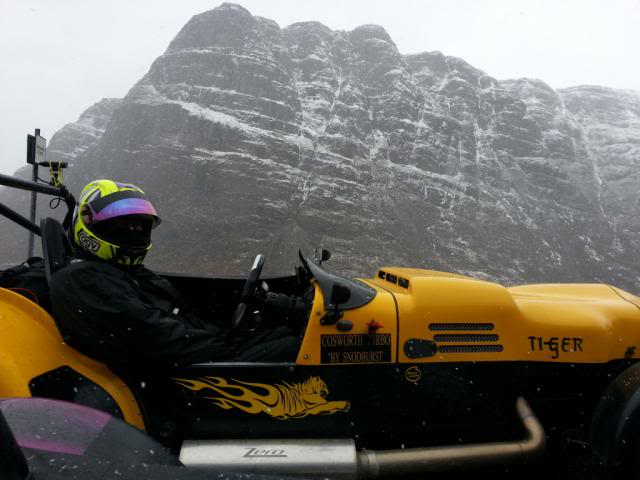
Replacing both the accelerator cables after I had issues in Scotland and kept the old ones as spares
Attempted twice to raise the steering wheel/Column meaning trimming the lower edge of the dash panel and also pulling the column back through the bulkhead so the hazard switch did not hit the bottom edge of dash when operated.
Removed and overhauled both the front callipers as one appeared to be bitting quicker than the other, stripping these down revealed sludge inside, eventually got the right refurb kit and after cleaning and powder coating them to match the painted carriers I had a few head scratching moments figuring out how to get the dust seal and piston in at same time, once reassembled and tested with an airline these are refitted and now need filling and bleeding, obviously I replaced the discs at the same time and whilst they was all off and access was good I removed the lower brackets that hold the coil over to the lower wish bones as the rust from them was staining the WBs, after cleaning these I realised they could do with some improving by welding the pieces fully together and then powder coated, all reassembled.
Somewhere along the line I decide to have a go at refitting the scuttle, bonnet and nose cone assembly to only realise the bonnet would not fully lower due to the WW motor mounted on the underside of the bonnet now hitting the fuse box as it was obviously now siting too high on it new support, so I had to take a few steps back and cut out approx 60mm from the support and re weld it all up, but got there in the end.
This allowed me to fit a new front number plate to replace the broken one, then on to the back where the rear number plate holder on the spare wheel carrier was a crap design so I removed it all and made a holder for the plate and it light as I did for the Locost years ago and screwed it to the wheel carrier so it is also a lot easier to get the spare off as well, this was all fitted once it had the black epoxy paint treatment and a new long plate rather than the old square one.
Now to try and load some pics
- Attachments
-
-
-
-
-
-
-
-
-
-
-
-
-
-
-
-
Locost book chassis, Undergoing testing post rebuild
Robin Hood 2B, keeping me sane
Sylva Leader, stuck to the trailer
Robin Hood 2B, keeping me sane
Sylva Leader, stuck to the trailer
-
locost220
- Posts: 4490
- Joined: Sat Mar 13, 2010 7:31 pm
- Location: Lewisham South London
- Contact:
Re: My Robin Hood nearly caught alight
Few more
- Attachments
-
-
-
-
-
-
-
-
-
-
-
-
-
-
-
Locost book chassis, Undergoing testing post rebuild
Robin Hood 2B, keeping me sane
Sylva Leader, stuck to the trailer
Robin Hood 2B, keeping me sane
Sylva Leader, stuck to the trailer
-
locost220
- Posts: 4490
- Joined: Sat Mar 13, 2010 7:31 pm
- Location: Lewisham South London
- Contact:
Re: My Robin Hood nearly caught alight
So part of the oops situation I found myself in after raising the steering wheel was not only not being able to shut the bonnet fully due to the new fuse box mount being too tall ( sorted in previous post) but also not being able to fully raise the scuttle, bonnet nose cone assembled due to the higher steering wheel hitting on the eyebrow of the dash top as the later pivots back and downwards when bonnet opened.
I firstly managed to make a shorter bonnet prop in place to allow me to reach most of the obvious oily bits whilst on my knees but given my expected anxiety on the first few drives since the cable melting issue I was not happy with that situation.
So after discussing the situation with others and keen to keep the steering wheel in the raised position I took others advice and ordered a removable steering wheel hub after some recommendations and a bit of u tube.
So upon it arriving it was obvious that these are ideally suited to adapters mounted on the steering column and to a number of selected aftermarket wheels such as sparking and mountey, so the ring of fixing points align on both half’s. My sierra based Robin Hood already had an adaptor to accept the mountey wheel but not the same diameter as the new removable hub.
So as expected I had to make a couple of adaptors/conversion plates.
This took me about 8 hrs yesterday, first starting with making sure the function would work before worrying about the outside diameter matching the adjacent fixtures, then fine running and painting.
So first made a plate to fit to the original column mounted adaptor and also hold the lower half of the removable hub, then second plate had to hold the second piece of the removable hub and also attach the original mountey steering wheel and then a Halfords button to replace the horn knob that originally fitted in the bottom adaptor after extending the horn wires in both half’s of the set up.
This as expected has moved the wheel over 60mm closer to me but still seems comfortable and still needs the wheel to be removed prior to bonnet being opened, I have had to move my sat nav location as it was now not fully visible.
Pics below in reverse order I am afraid
- Attachments
-
-
-
-
-
-
-
-
-
-
-
-
-
-
-
-
-
-
-
-
Locost book chassis, Undergoing testing post rebuild
Robin Hood 2B, keeping me sane
Sylva Leader, stuck to the trailer
Robin Hood 2B, keeping me sane
Sylva Leader, stuck to the trailer
-
Wingco
- Posts: 2761
- Joined: Thu Jul 26, 2012 9:49 am
- Location: Swanley, Kent
- Contact:
Re: My Robin Hood nearly caught alight
So was it just the steering wheel that was giving you grief with knees and getting in and out ? But this has been sorted now ?
Looks a good fit Rich nice tidy job.
Looks a good fit Rich nice tidy job.
Mirror, Signal go faster pedal !!
Return to “Car Related Discussion”
Who is online
Users browsing this forum: No registered users and 25 guests